The quote used in the title comes from our mortgage broker, who came to the house to say hello and see the “unique” property that everyone kept talking about during the buying process. The first thing she did was look at the closet and say, “You know, West Islanders change nothing in their house; how can people live like this?”
I agree with her so the next “weekend project” is to redo the closet in the entrance hallway. I got in trouble for starting this project because the agreement was that we wouldn’t do any destruction/construction until we’d seen all four seasons in the house. And, this was a destruction/construction project full of unexpected surprises (as you’re about to see).
Plus, we’re kind of poor now that we bought another house… and we can’t get income by renting out /selling our house in Calgary thanks to Done Wrong Contracting.
But, my reasoning for doing the closet now is (I think) pretty sound:
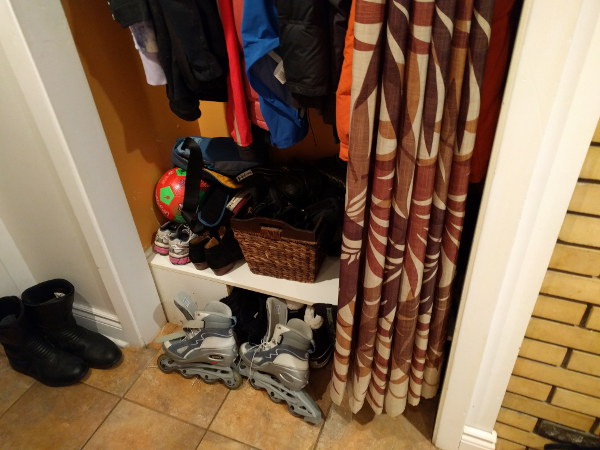
1) The closet looks like crap and it’s the first thing everyone sees when they come into the house; and, to hide a massive mess behind an ugly brown shower curtain is just plain lame. It’s embarrassing. We have standards.
2) I’m clumsy enough to get hurt by tripping over stuff as it spills out of the closet and onto the floor. I’m also tired of looking at a big pile of mess that I’m constantly stuffing back into the closet. It’s already hard enough to get an 11-year old to put her things away properly; and, the lame closet makes it easier for her to throw things on the floor… because there’s no actual “proper” place.
3) Winter is coming and that means lots of jackets and boots and snow and mud and more mess. It means book bags and swim bags and wet dog walking gear. It also means I’ll never be able to find anything under the pile of mess. I’m not going to live through a year of that.
4) There’s too much wasted space. Only the bottom 3/4 of the closet is usable… and a quarter of the bottom 1/4 is wasted space thanks to a big white box. The closet has space, why not use all of it.
Behold, the lovely hall closet AFTER it was cleaned up and a bunch of jackets moved to bedroom closets:

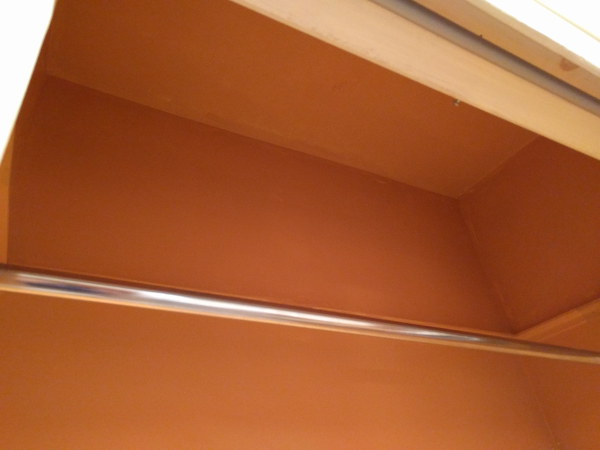
And, there’s two feet of awkward space above the jackets that’s not being used:

Phase 1
The first step was destruction.
This was the easy part… though for some reason, everything was surrounded by caulking. This is very odd because the tile flooring under the white shelf (where boots would go) wasn’t grouted. So, any water from boots went between the tiles.
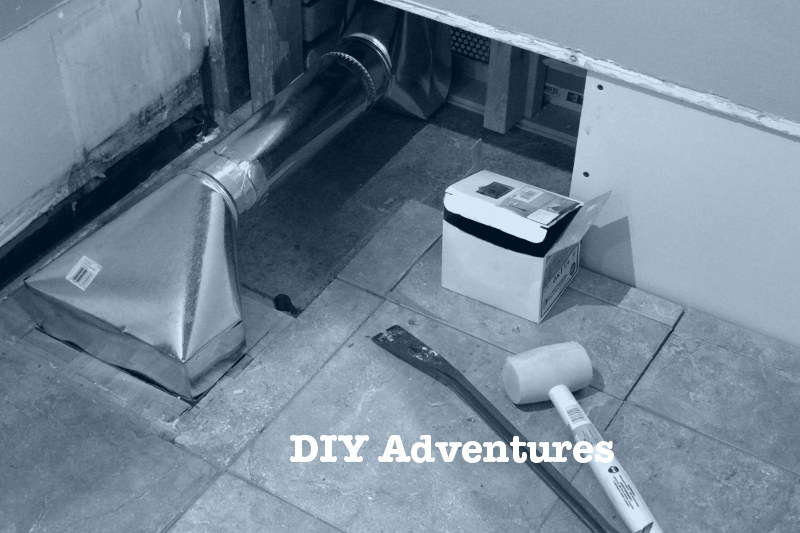
Behold the next odd thing we encountered. A strange metal box.
This could easily be used as a stash spot because there is a removable access to said box from the living room.
The entire closet was built around this strange metal box, which is in actuality, a hacked-in heating duct. Beyond the odd fact that this duct is running above the floor, out of a closet, and behind a glass door, the whole thing is (we think) meant to heat the living room… (pause for effect)… the living room with the big fireplace that dominates the whole house.
After pondering the metal box, which is very large at 14-inches high and 24-inches long, we decided to keep the duct and not close it off because we don’t know how cold the house gets in the winter (which is why we should wait to see all the seasons BEFORE doing construction).
The previous homeowners put a lot of effort into building a closet around this box, so I’m assuming it has an important purpose. But, it doesn’t need to be 14×24 inches. The plan is to cut the size of the box in half and use proper duct materials.
After removing the white melamine, we discovered just how poorly put together the closet was, partially because of what is behind each wall. There is no frame and things like the flooring and the lower back wall were resting in position without being attached. Chances are they were all glued and it came unglued.
I suspect that there was originally no closet in this space and that it was a walkway arched by the same bricks used for the fireplace. The only framing seems to be for the wall on the living room side (the arched wall beside the fireplace). Also, there’s brick on the left and right side of the closet… now covered with drywall.
If we were to look at the paint colours archaeologically (by layers), the back wall has one paint layer: orange. The side walls have three paint layers: orange, pink, and yellowy beige glue. So, the back wall was added before it was painted orange, but after the pink and beige. The bottom layer is cement.
I’ve seen the pink in other rooms under layers of paint; I think it’s original.
Under the tile is the original parquet.
When looking at houses for sale in the community (we looked at many many houses), there were two types: those that still had their parquet and those that didn’t.
I’m a huge fan of original wood flooring, but 1950s parquet is rather ugly and most of the stuff we saw in other houses looked really worn down. So, would we keep it? No. It’s likely that the original floors were wrecked by the installation of the tile.
After framing the bottom part of the wall, we built out a smaller heating duct, drywalled, and added multiple layers of mud to the wall.
While working on the wall on the left, the paint flaked/peeled off. So, dP had to scrape the paint off and then add a thin layer of compound to the wall to make it paintable. The other two walls did not have the same problem.
Next came the paint, the same Light French Grey from the upstairs hallway project; we had just enough to finish the closet. Again, it’s a dark space so we went with the lighter grey. Also, this particular grey goes well with Phase 2 of this project and pulls the grey out of the floor tiles so it’s less “in-your-face-orange.”
Once painted, I grouted the tiles; the tiles in the closet were not attached and just laying in situ. dP glued them down before the drywalling.
People always complain about grouting, but I’ll admit that I find it rather soothing and fun… like finger painting and playing with wet sand at the same time. I used this opportunity to fix all the cracked and missing grout around the house.
The last part of Phase 1 was to add the baseboards and 1/4 rounds to hide the not square walls and a huge gap in the flooring. Yes… one of the baseboards is floating… Phase 2 will take care of that.
Phase 2
After searching high and low on the internet for closet ideas, and being flooded and overwhelmed by designs, neither of us wanted to deal with designing the closet. So, we called California Closets for a consultation and let them deal with Phase 2.
A designer came to our house, took an inventory of the things we put in the closet, asked questions about our activities, took measurements, and came up with a design.
And then a really nice guy named Terry showed up at our house and put the design in. It was super fast… like in an hour… and we had a new closet design.
We are going to live with it for a while without a door. The desired state is to add a sliding barn door; but, we’ll wait and see how space evolves.
